Capture, log, and play back broadcast and live multicam — on-prem, software-only, or in the cloud. Real-time logging straight into your edit, with frame-accurate control across every channel.
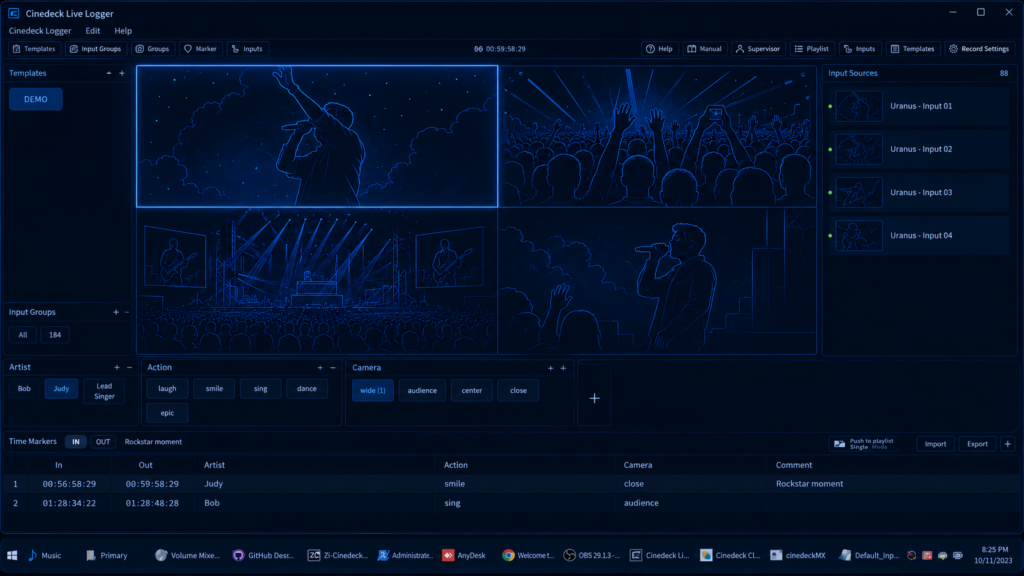
Real-time metadata tagging during capture. Mark key moments as they happen and push logging XML straight into Premiere, Avid, Resolve, or Final Cut — post starts before the shoot ends.
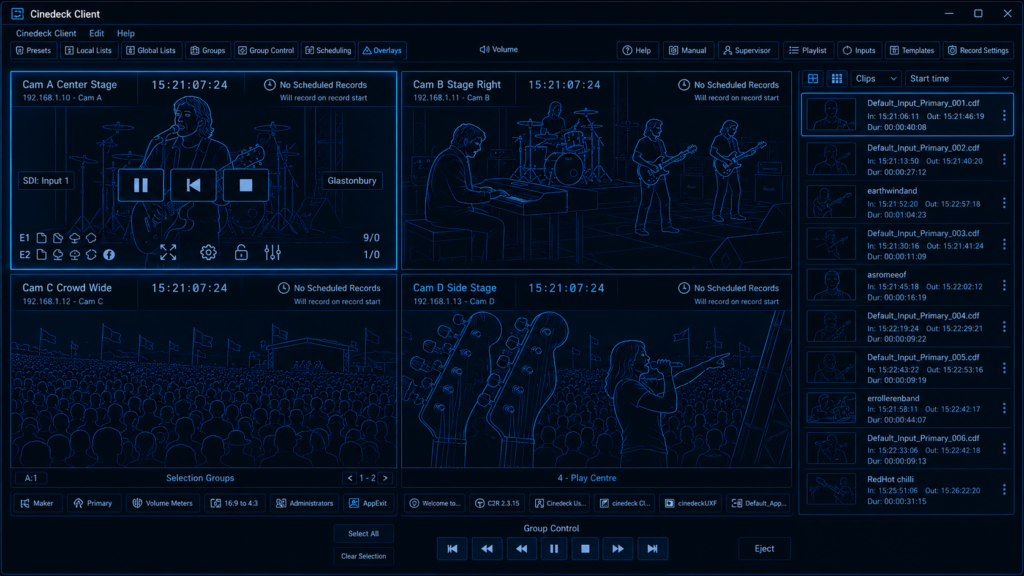
Playlisting
Select and reorder clips from any device on the network. Play out mixed framerates and codecs with frame-accurate in and out points — dedicated playout on any channel.
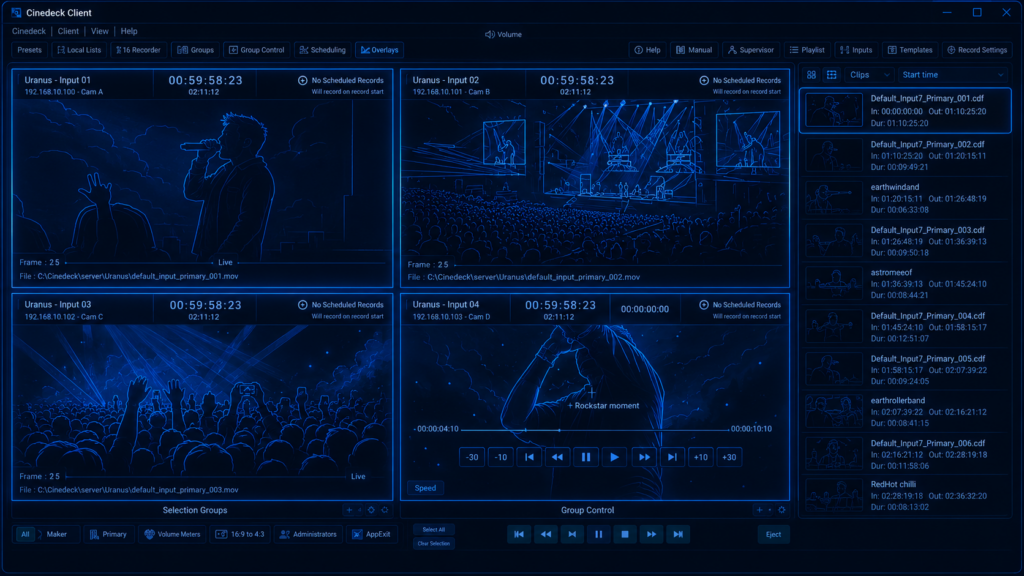
Live Replay
Set points, send clips for immediate review, or build highlight reels while the clip is still growing. Full transport control and scrubbing, on-site or in the cloud.
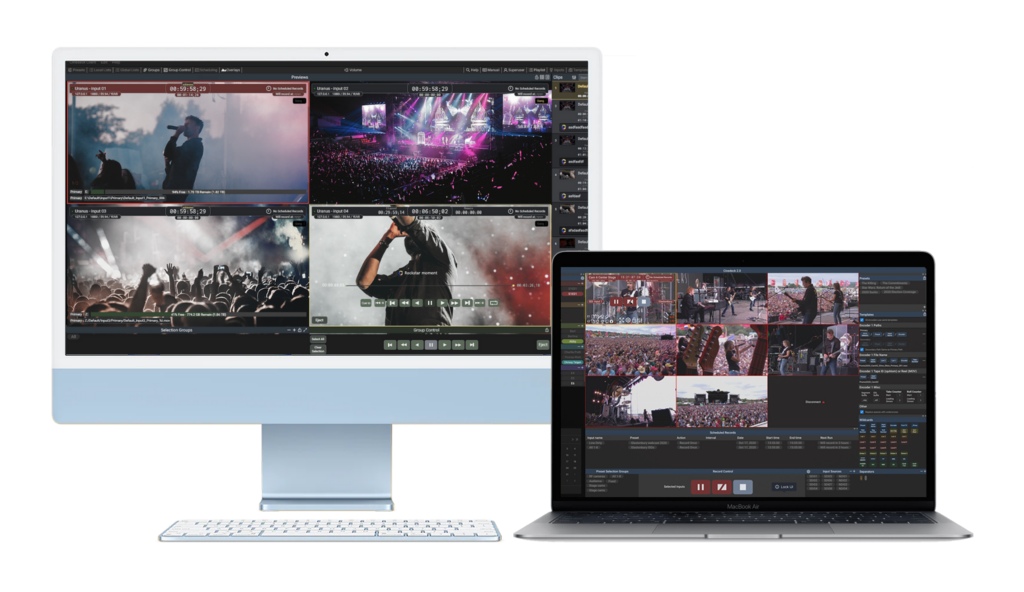
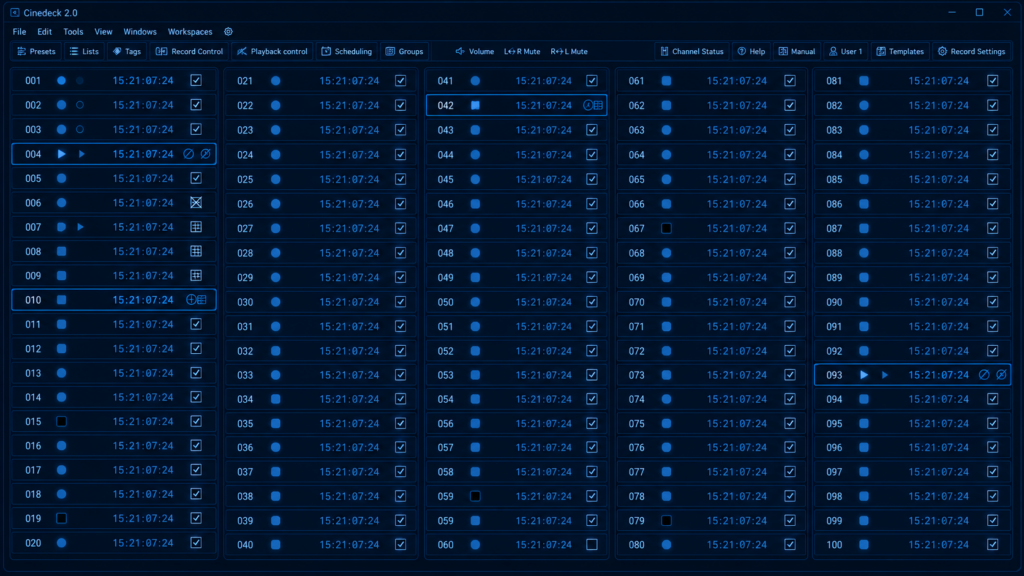
Capture Grid
Control and monitor up to 100 channels in a single interface. Record groups of channels with perfect frame-sync — built for high-scale, complex multichannel productions.